Use Cases
Company Research Agent
Build a Generative UI Company Research agent using Thesys
For the purpose of demonstration, this guide will build a Generative UI search application where the user can search for information related to companies. The guide can be broken down into
2 sections:
- Implementing the backend
- Implementing the frontend
A complete example implementation of the search application demonstrating
C1Component usage can be found
here.This guide is much easier to follow if you’ve already completed the
Quickstart. You can simply replace code in existing files and
create new files as required!
Implementing the backend
1
Add a system prompt
For the search application, the following system prompt can be used to tailor the UI output to enable the user to search companies ask follow up questions:
app/api/chat/systemPrompt.ts
To learn more about system prompts and how you can use them to tailor the output of the LLM to your specific use-case, check out the Using System Prompts guide.
2
Add tools
In a search application, the agent may need a tool to search the web for up-to-date information. This guide adds a web search tool powered by Tavily to search the web
and the packages -
zod along with zod-to-json-schema to provide the schema for the tool.To learn more about tool-calling and how you can use tools to extend the capabilities of your agent, check out the Tool Calling guide.
3
Create a backend endpoint
For the purpose of the search application, the API may only need the search query and the previous agent response (if any) so that the LLM can generate an appropriate response.
Since the entire conversation history is not required, the API endpoint may look somewhat as follows:
Implementing the frontend
Unlike theC1Chat component, the C1Component leaves it up to the user to manage state to provide greater flexibility. Therefore, the frontend implementation can be broken
down into the following parts:
- Implementing state management
- Making the API call
- Implementing the UI
1
Implementing state management
For the search application, the following states should suffice:A
query- The search query entered by the userc1Response- For storing the response sent by the C1 APIisLoading- For tracking when a request is in progressabortController- For managing request cancellation
The states required can depend on individual application requirements. Feel
free to make changes to the states as per your use case.
useUIState hook can be used to manage the state and provide a clean interface to UI code for accessing and modifying the state. Here’s an example implementation:2
Setting up the API call
Since the search application does not need the entire conversation history to function, it is sufficient to send the current user search query and the previous agent response (if any) to
the backend for generating a response. This ensures that if the current query is a follow up question based on the previous search result, the LLM can generate an appropriate response.A function
makeApiCall can be implemented as follows:3
Implementing the UI
For a search application, the following components are required:
- A search query input box
- A “Submit” button to initiate the search
C1Componentfor rendering the Generative UI response.
C1Component in a ThemeProvider to ensure that the rendered components are styled correctly.Here’s an example code block implementing the entire UI, with the important sections highlighted:app/home/page.tsx
Expand to see the code for the Loader component
Expand to see the code for the Loader component
app/home/Loader.tsx
4
Test it out!
That’s it! Your search app with 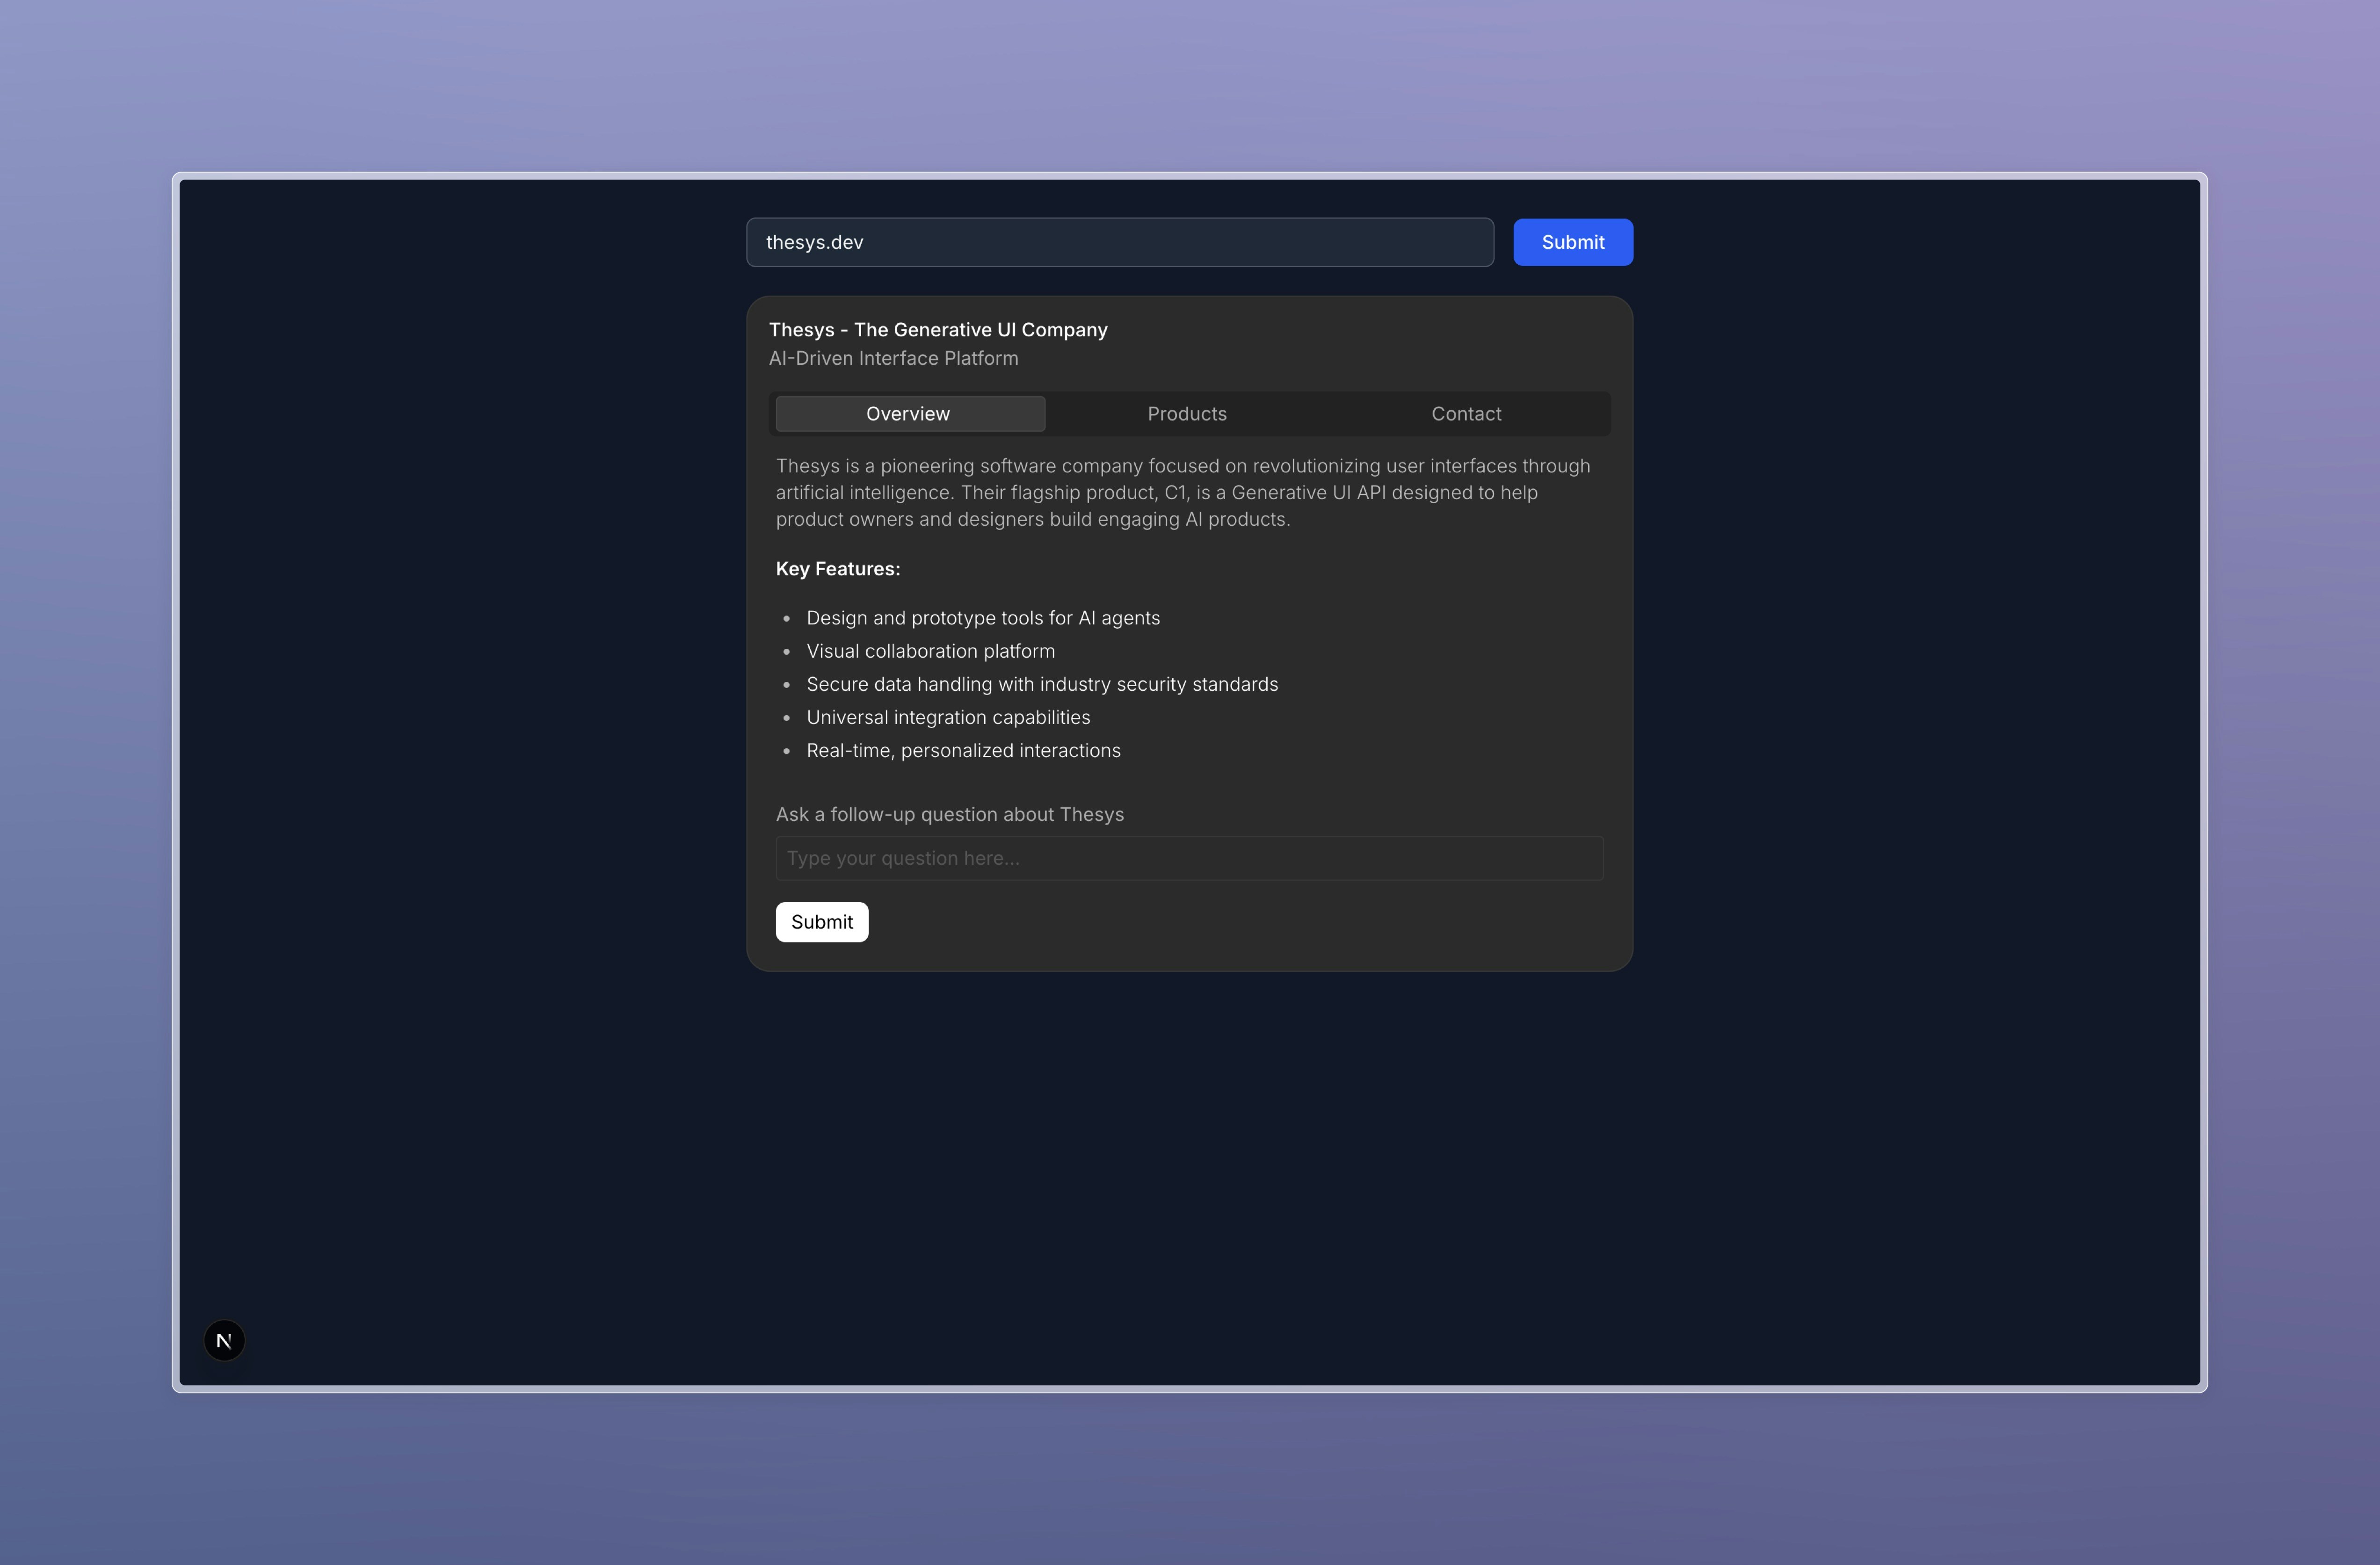
C1Component is now complete. Try running it and search for a few companies on the /home route!